
Contents
- Running the Configuration Wizard
- Deploying the 'CardioLog Analytics' SharePoint Feature
- Automatically Add the JavaScript Tracking Code
- Manually Add a JavaScript Tracking Code
- Tracking Document Usage From Within Office
- Configuring Multiple Web Applications
- Configuring Multiple Farms
- Configuring Reporting Data Cache
Running the Configuration Wizard
Upon activating CardioLog, the Configuration Wizard will be displayed. This wizard will help you configure the SharePoint Tracking Agent, a tool designed to monitor visitor behavior in SharePoint, and the SharePoint Adaptor, which configures the structure for your SharePoint portal. Additionally you can start the wizard at any time to reconfigure your system by going Administration in the navigation pane and opening System Configuration. Select Configuration Wizard to initialize the system.
Login to the CardioLog server with your CardioLog service account and verify that it has the required permissions before running the wizard.
Please review this entire section before running the Configuration Wizard in order to determine the tracking mechanism that should be deployed. If you choose to deploy The CardioLog Analytics SharePoint feature, the wizard should run with SharePoint administrator privileges.
- Launch CardioLog.
- In the Welcome dialog, select the desired interface language and date format, and your SharePoint version, then click Next.

Configuration Wizard Step 1 Step 2 of the Configuration Wizard, SharePoint Online Usage Tracking, can be performed either automatically or manually. Please select only one option to configure the Tracking Agent.

Configuration Wizard Step 2a
- Click Next to continue, which will start the event collection test.

Configuration Wizard Step 2 Installation - Follow the steps listed and click Next Step upon completing each instruction in the dialog.
Deploying the 'CardioLog Analytics' SharePoint Feature
CardioLog provides a streamlined solution (cardiologtrackingagentfeature.wsp) for installing the JavaScript tracking code on all of your SharePoint farm pages. This SharePoint solution includes a farm-scoped feature named CardioLog Analytics, which can be activated or deactivated using SharePoint's Central Administration.
Note: Confirm that you have administrator permissions for your SharePoint farm, SharePoint application server and Web Front End server before configuring your servers.
- In the Usage Tracking dialog, select "Yes, install and activate CardioLog Analytics SharePoint Feature" and enter the SharePoint application server machine name:

Step 2 - Usage Tracking - Click Next to continue.
Wait while the wizard installs the cardiologtrackingagentfeature.wsp solution file, deploys the solution throughout all web front ends, and activates the CardioLog Analytics feature. If this step fails, please see "CardioLog Analytics" SharePoint Feature Manual Installation Procedure.
To confirm the solution has deployed properly, go to SharePoint 2013, and navigate to Central Administration > System Settings > Manage farm solutions
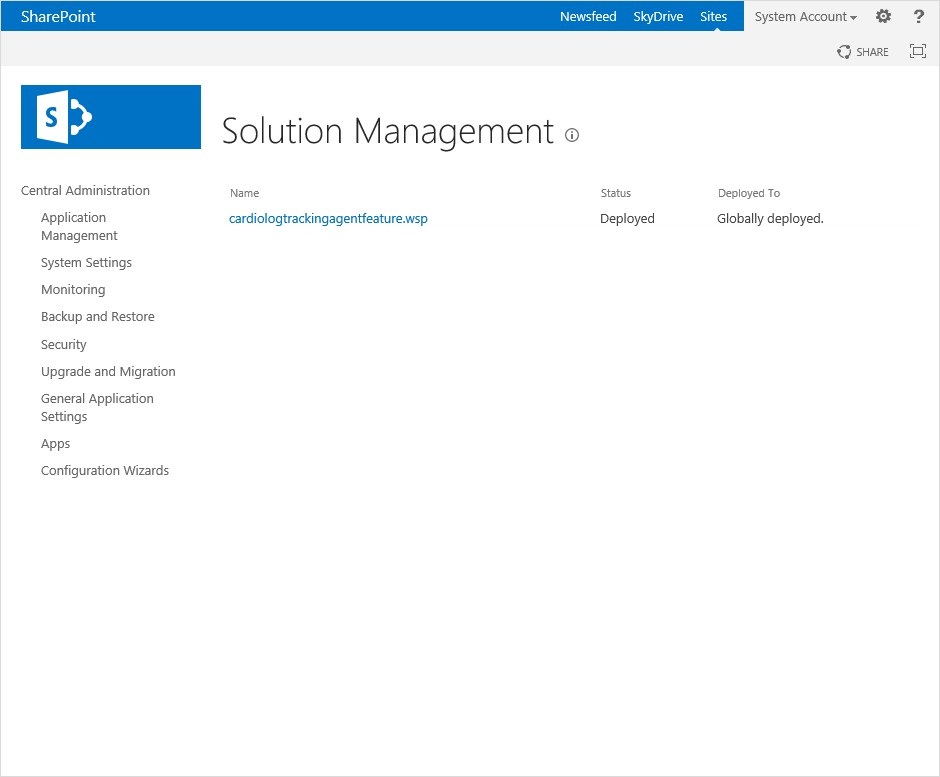
SharePoint 2013 - Solution Management
In the Solution Properties window, click cardiologtrackingagentfeature.wsp and verify that the solution was successfully deployed to all web front ends.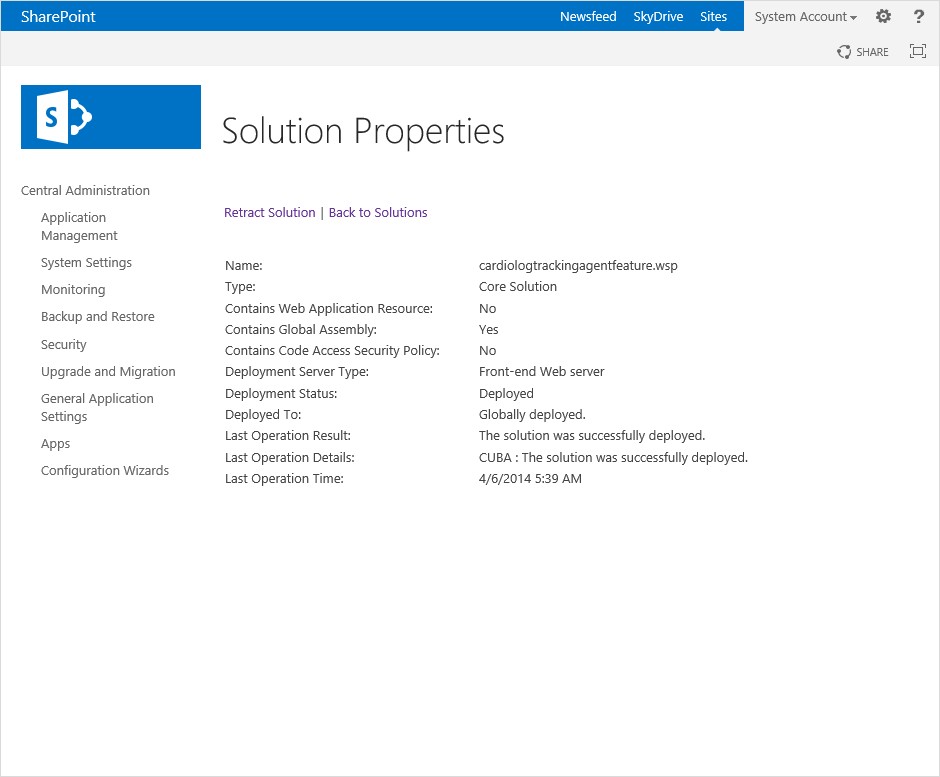
SharePoint 2013 - Solution Properties
To view the deployed solution in SharePoint 2010, go to Central Administration > System Settings > Manage farm solutions
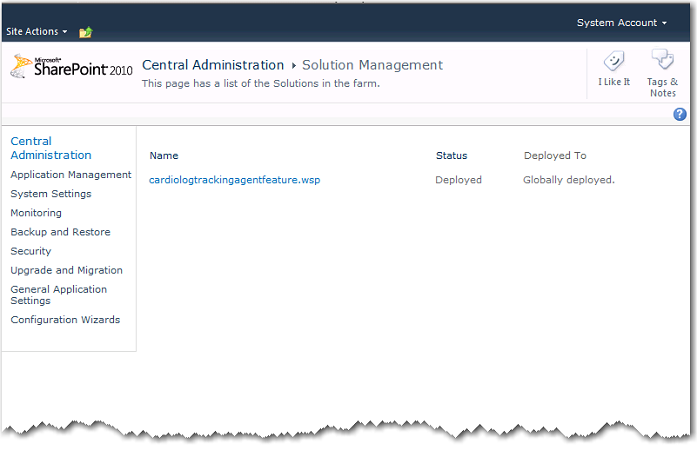
SharePoint 2010 - Solution Management
In the Solution Properties window, click cardiologtrackingagentfeature.wsp and verify that the solution was successfully deployed to all web front ends.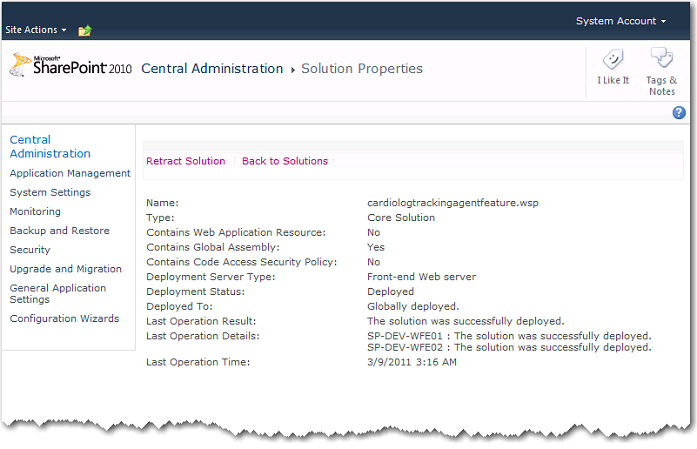
SharePoint 2010 - Solution Properties
To view the deployed solution in MOSS 2007, go to Central Administration > Operations > Solution Management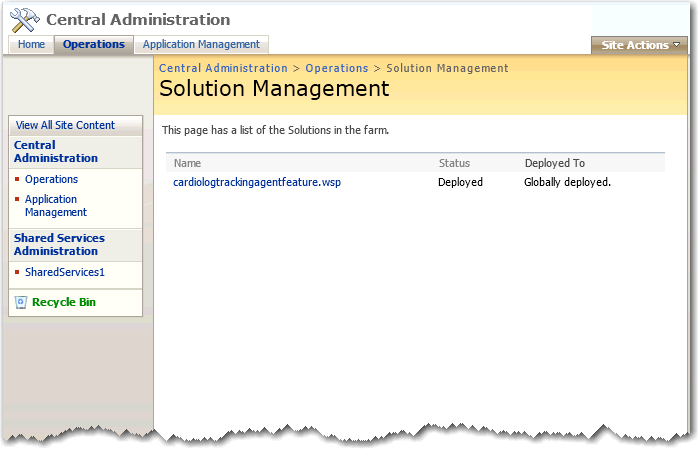
MOSS 2007 - Solution Management
In the Solution Properties window, click cardiologtrackingagentfeature.wsp and verify that the solution was successfully deployed to all web front ends.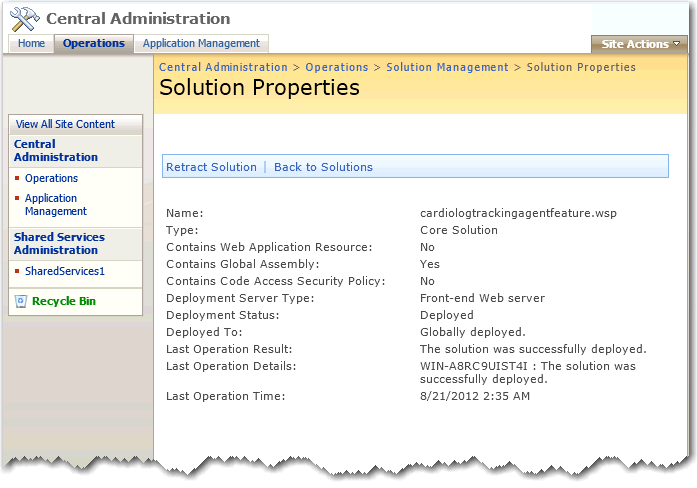
MOSS 2007 - Solution Properties
Activate/Deactivate Data CollectionThe CardioLog Analytics feature is automatically activated and starts data collection immediately upon installation. The CardioLog Analytics solution may also be manually deactivated and reactivated.
Warning: Deactivating the solution will stop all data collection until reactivated.
To deactivate the CardioLog Analytics feature in SharePoint 2013, go to Central Administration > System Settings > Manage farm features

SharePoint 2013 - Manage farm featuresTo deactivate the CardioLog Analytics feature in SharePoint 2010, go to Central Administration > System Settings > Manage farm features
SharePoint 2010 - Manage farm features
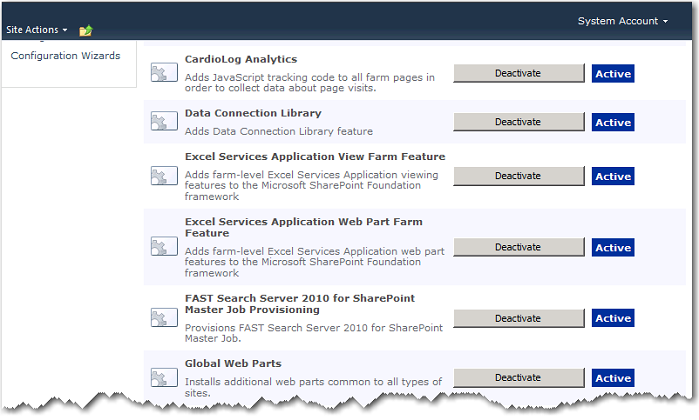
To deactivate the CardioLog Analytics feature in MOSS 2007, go to Central Administration > Operations > Manage farm features
MOSS 2007 - Manage farm features
Note: The CardioLog Analytics SharePoint Feature will work only for master pages which contain the following control in the head section:<SharePoint:DelegateControl runat="server" ControlId="AdditionalPageHead" AllowMultipleControls="true"/>
This control is included in the master pages for all SharePoint templates, except the MOSS 2007 Publishing Site master page. Add this control to all MOSS 2007 Publishing Site master pages, right before the closing </HEAD> tag. Alternatively, you can also use a top master file, which is included in all of the Publishing Sites master pages, in order to perform a single update.
Automatically add the JavaScript tracking code
Notes: This step should be done for each WFE. The CardioLog service account must have write permissions to the SharePoint template directory:
[SharePoint 2013 Server]\%PROGRAMFILES%\Common Files\Microsoft Shared\web server extensions\15\TEMPLATE
[SharePoint 2010 Server]\%PROGRAMFILES%\Common Files\Microsoft Shared\web server extensions\14\TEMPLATE
[SharePoint 2007 Server]\%PROGRAMFILES%\Common Files\Microsoft Shared\web server extensions\12\TEMPLATE
In the Usage Tracking dialog, select "Yes, add the tracking code to my SharePoint INIT.JS files" and enter the SharePoint WFE server names, to allow CardioLog to automatically add the tracking code to all SharePoint pages served by the all the WFEs in your farm (the tracking code is added to init.js in SharePoint 2010 and SharePoint 2013, and core.js in SharePoint 2007).
Note: If your SharePoint website runs on SSL, you will have to create a certificate for the CardioLog website and configure it to enable SSL. Alternatively, you can install the CardioLog Analytics SharePoint Feature.
See how to configure the Tracking Agent with SSL for more details.
Step 2 - Usage Tracking Installation Options
- Click Next to continue.
Manually Add a JavaScript tracking Code
If you wish to add the tracking code yourself - select "No, I will add the tracking code myself." and copy the JavaScript tracking code to a common page component of your choice, including master pages, page toolbars, Web Parts, headers or footers. If you choose a common JavaScript (.js) file, verify you have removed the opening and closing <script> tags!
In order to test the tracking agent, follow these steps:
- Open a new browser window and click Next Step.
- Delete your browser temporary internet files and click Next Step.
- Browse through at least 3 pages on your SharePoint website and click Next Step.
- Click Test Event Collection.
- In the SharePoint Adaptor dialog, enter the SQL server instance name and the SharePoint configuration database name for your farm. Specify the authentication method used to connect to the database, then click Next.
Note: In order to edit the tracking code, you will need to be assigned the SharePoint Administrator role in Office 365 Admin Center, found under Customized Administrator when editing User Roles in MS Office 365.
Step 3 - SharePoint Adaptor - In the SharePoint Adaptor dialog, select the SharePoint website(s) you would like to report on.
- Enter the name of one of your SharePoint Web Front Ends, then click Next.
Note: Loading your SharePoint tree structure may take several minutes, depending on the number of items in the selected web sites.
Step 3 - SharePoint Adaptor Web Site Selection - In the SharePoint Adaptor dialog, expand the web site tree and verify that it shows your desired SharePoint web application, then click Next.
- In the Usage Data Processing dialog, wait until the CardioLog Scheduling has activated, then click Next.
- In the Finish dialog, you should be created with a confirmation that everything has been properly configured, and then you can click Finish. Click Show Raw Usage Data to view the usage events collected thus far. All data will be available in reports within the next hour.
- Assign roles for users.
- Configure email alerts for scheduled services and event collection thresholds that will be sent to the administrator.
- Configure the Active Directory Update Service in order to segment authenticated visitors by their user names and their groups.
Tracking Document Usage From Within Office
- In the SharePoint server, add CardioLogHttpModule.dll to the GAC (See the Microsoft documentation for more information). The dll file can be found in the CardioLog installation folder: <\CardioLog\CardioLogScheduleServices\CardioLogHttpModule.dll>
- In the SharePoint server, for each web site, modify the SharePoint Web.config file:
To register the module for IIS 6.0 and IIS 7.0 running in Classic Mode:<configuration>
<system.web>
<httpModules>
<add name="CardioLogHttpModule" type="CardioLog.HttpModules.EventsModule,CardioLogHttpModule, Version=1.19.154.6, Culture=neutral, PublicKeyToken=56b51e29d93ab3fb" />
To register the module for IIS 7.0 running in Integrated Mode:<configuration>
<system.webServer>
<modules>
<add name="CardioLogHttpModule" type="CardioLog.HttpModules.EventsModule,CardioLogHttpModule, Version=1.19.154.6, Culture=neutral, PublicKeyToken=56b51e29d93ab3fb" />
Add the following keys:
<configuration>
<appSettings><add key="CardioLog.Events.DocExtensions" value=".doc*.docx*.ppt*.pptx*.pps*.ppsx*.txt*.pdf*.xlr*.xls*.xlsx*.log*.msg*.odt*.rtf*.csv*"/>
<add key="CardioLog.Events.ExcludeUserAgents" value="Microsoft Office Existence Discovery*"/>
<add key="CardioLog.API.EventsServiceUrl" value="http://<CardioLog server>:<port>/CardioLogAPI/Events.asmx"/>
<add key="CardioLog.Events.LogFile" value="C:\CardioLogHttpModule.log"/>
<add key="CardioLog.Events.LogLevel" value="None"/><!--None,Error,Message-->
<add key="CardioLog.Events.SharePointVersion" value="2013"/>Optional keys:
<!-- Support claims based authentication --><add key="CardioLog.Events.SupportClaimsAuth" value="true"/>
<add key="CardioLog.Events.ClaimsAuthRegex" value=""/>
<add key="CardioLog.Events.ClaimsAuthRegexGroupMatch" value=""/>
<!-- Ignore the event if a user already accessed the same document in the last 1000 milliseconds -->
<add key="CardioLog.Events.CacheExpirationTimeoutInMs" value="1000"/>
Edit the values for:- CardioLog.Events.SharePointVersion - the SharePoint version (2007/2010/2013)
- CardioLog.Events.DocExtensions - a list of star separated file extensions you want to track
Note: Make sure to enter all relevant document types in the "CardioLog.Events.DocExtensions" key (There's no need to add ".aspx", ".asp", ".php", ".htm" as they are included by default). You can use the Document Types CardioLog Report located in the Portal Growth folder of the Report Center navigation pane to see all document types included in your SharePoint environment. - CardioLog.Events.LogFile - log file location
- CardioLog.API.EventsServiceUrl - modify the CardioLog server name and port
- Open this file for editing: [Installation directory]\CardioLogAgent\js\AgentEmbed.js
- In AgentEmbed.js, set element.HandleFileExtension to false:
element.HandleFileExtension = false;
In versions lower than 2.0.8.0, this file should be located in [Installation directory]\CardioLogAgent\AgentEmbed.aspx - Restart the SharePoint IIS server (iisreset).
[Installation directory] - By default, the CardioLogAgent folder is located in the CardioLog Installation folder. If the CardioLog Analytics SharePoint feature is installed, the CardioLogAgent folder should be located on all SharePoint WFEs under the SharePoint website "_layouts" folder.
Configuring Multiple Web Applications
In order to monitor an additional web application in your existing farm, please do the following:
- Add the required SQL permissions to the CardioLog service account - db_datareader for the SharePoint portal content database.
- In the Administration pane, click System Configuration, and then select SharePoint Tree Adaptor.
- Click on your SharePoint farm and select the web application/s you want to monitor.
- Click Save.
- In versions lower than 2.0.8.0, add the portal root URL to the "includedWebApps" key in the <CardioLog Installation Folder>\SP20XXTree\web.config file (XX - 07 for MOSS 2007, 10 for SharePoint 2010, 13 for SharePoint 2013).
- Restart the CardioLog Scheduling Service. The tree structure will be refreshed the next day.
- If you are using the CardioLog Analytics tracking feature or if you have configured the CardioLogAgent web application on the SharePoint WFEs, open the new web application in IIS Manager and verify that the CardioLogAgent folder under the "_layouts" directory is configured as a web application (if not, right click on it and select "Convert to Application").
- Verify data collection from the new web application.
Configuring Multiple Farms
In order to monitor multiple SharePoint farms per adaptor, please do the following:
- Add the required SQL permissions to the CardioLog service account - db_datareader for the SharePoint portal content database, and grant read access to the SharePoint TEMPLATE folder.
- Configure event collection by deploing the JavaScript tracking code on all SharePoint WFEs. This can be done by installing the CardioLog Analytics tracking agent feature or by inserting the code manually (to your master pages, or to init.js in SharePoint 2010 and SharePoint 2013, core.js in SharePoint 2007)
- In the Administration section of the navigation pane, click System Configuration, and then select SharePoint Tree Adaptor.
- Click Add Farm, and then select your SharePoint version.
- In the SharePoint Tree Adaptor dialog, fill out the following fields:
- Name - This is the title of the farm folder which will be displayed in the CardioLog tree structure in the Analysis Center. Example: "SharePoint 2013"
- Server Name - The primary server CardioLog is enabled on
- Database Server - The SharePoint database instance name.
- SharePoint Configuration Database Name - The SharePoint configuration database name. Example: "SharePoint_Config"
- Authentication - Database authentication type. Click Set to choose between Windows Integrated and SQL Server Authentication).
- SharePoint TEMPLATE Directory - This is the full path for the SharePoint 'TEMPLATE' directory. Example: "\\<sharepoint server name>\C$\Program Files\Common Files\Microsoft Shared\Web Server Extensions\XX\TEMPLATE\" (XX - 12 for MOSS 2007, 14 for SharePoint 2010, 15 for SharePoint 2013)
- Advanced Settings - Select the additional import and transfer preferences you would like to include.
- Click Apply.
- Select the web application/s you want to monitor, then click Save.
- After the next run of Portal Tree Updates, the updated tree structure will be displayed in Analysis Center (Object Explorer).

System Configuration - SharePoint Tree Adapter - In versions lower than 2.0.8.0, configure the tree service web.config file:
In <CardioLog Installation Folder>\SP20XXTree\web.config (XX - 07 for MOSS 2007; 10 for SharePoint 2010; 13 for SharePoint 2013), add the following keys to the <appSettings> section with the "profile_1_ "prefix (additional farms are considered additional profiles):
- profile_1_includedWebApps - this is a star separated list of web applications (virtual servers) to include in the tree.
- profile_1_SharePointTemplatePath - this is the full path for the SharePoint 'TEMPLATE' directory (XX - 12 for MOSS 2007, 14 for SharePoint 2010, 15 for SharePoint 2013)
- profile_1_FarmFolderName - Optional. This is the title of the farm folder which will be displayed in the CardioLog tree structure in the Analysis Center.
- profile_1_outputFilePath - this is the full path of the CardioLog installation folder 'Logs' directory which will store the tree structure output file (XX - 07 for MOSS 2007, 10 for SharePoint 2010, 13 for SharePoint 2013).
<appSettings>
<add key="profile_1_includedWebApps" value="http:// <sharepoint server name>:<port>*" />
<add key="profile_1_SharePointTemplatePath" value="\\<sharepoint server name>\C$\Program Files\Common Files\Microsoft Shared\Web Server Extensions\XX\TEMPLATE\" /><add key="profile_1_FarmFolderName" value="SharePoint 2010" />
<add key="profile_1_outputFilePath" value="<CardioLog installation folder>\CardioLogScheduleServices\Logs\SP20XXTree_1.xml" />
</appSettings>
Add the following keys to the <connectionStrings> section:
- profile_1_configDB - this is the connection string for the SharePoint configuration database.
- profile_1_contentDB - this is a place holder for creating connection strings to the SharePoint content databases. Note: Leave "Initial Catalog={0};Data Source={1} " as it is.
<connectionStrings>
<add name="profile_1_configDB" connectionString="Integrated Security=SSPI;Persist Security Info=False;Initial Catalog=<sharepoint config database name>;Data Source=<database server name>" />
<add name="profile_1_contentDB" connectionString="Integrated Security=SSPI;Persist Security Info=False;Initial Catalog={0};Data Source={1}" /></connectionStrings>
Go to Administration > CardioLog Scheduling Service > Portal Tree Updates and add the new profile to the Portal Tree Updates web services list:
http://<CardioLogServer>:<port>/SP20XXTree/default.aspx?profile=1&output=file&logFilePath=[CardioLog Installation Folder]\CardioLogScheduleServices\Logs\SP20XXTree_1.xml (XX - 07 for MOSS 2007; 10 for SharePoint 2010; 13 for SharePoint 2013)
Restart the CardioLog Scheduling Service. The tree structure will be by the next day.
Note: In order to add multiple farms, use a unique number when identifying the profile name. ie. profile_2_, profile_3_ , and so on.
Configuring Reporting Data Cache
To improve performance, CardioLog caches the results for each reporting query according to the specific report filter and date range used. In the Cache Configuration page, you can define the amount of time queries are cached, and clear the entire reporting cache.
- In the Administration section of the navigation pane, click System Configuration, and then select Reporting Data.
- In the Reporting Data Cache Configuration box, check Enable Reporting Data Caching to enable report caching.
- Fill out a value for the Cache life time in days field.
- Click Save
- Click Clear Cache if you want to clear the entire reporting cache.

System Configuration - Reporting Data Cache Configuration