Contents
- Running the Configuration Wizard
- Deploying the 'CardioLog Analytics' SharePoint Feature
- Automatically Add the JavaScript Tracking Code
- Manually Add a JavaScript Tracking Code
- Tracking Document Usage From Within Office
- Configuring Multiple Web Applications
- Configuring Multiple Farms
- Configuring Report Data Cache
Running the Configuration Wizard
Upon activating CardioLog, the Configuration Wizard will be displayed. This wizard will help you configure the SharePoint Tracking Agent, a tool designed to monitor visitor behavior in SharePoint, and the SharePoint Adaptor, which configures the structure for your SharePoint portal. Additionally you can start the wizard at any time to reconfigure your system by going Administration in the navigation pane and opening System Configuration. Select Configuration Wizard to initialize the system.
Login to the CardioLog server with your CardioLog service account and verify that it has the required permissions before running the wizard.
Please review this entire section before running the Configuration Wizard in order to determine the tracking mechanism that should be deployed. If you choose to deploy The CardioLog Analytics SharePoint feature, the wizard should run with SharePoint administrator privileges.
- Launch CardioLog.
- In the Welcome dialog, select the desired interface language and date format, and your SharePoint version, then click Next.
Configuration Wizard Step 1 Step 2 of the Configuration Wizard, SharePoint Online Usage Tracking, can be performed either automatically or manually. Please select only one option to configure the Tracking Agent.
Configuration Wizard Step 2a
- Click Next to continue, which will start the event collection test.
Configuration Wizard Step 2 Installation - Follow the steps listed and click Next Step upon completing each instruction in the dialog.
Deploying the 'CardioLog Analytics' SharePoint Feature
CardioLog provides a streamlined solution (cardiologtrackingagentfeature.wsp) for installing the JavaScript tracking code on all of your SharePoint farm pages. This SharePoint solution includes a farm-scoped feature named CardioLog Analytics, which can be activated or deactivated using SharePoint's Central Administration.
Note: Confirm that you have administrator permissions for your SharePoint farm, SharePoint application server and Web Front End server before configuring your servers.
- In the Usage Tracking dialog, select "Yes, install and activate CardioLog Analytics SharePoint Feature" and enter the SharePoint application server machine name:
Step 2 - Usage Tracking - Click Next
Wait while the wizard installs the cardiologtrackingagentfeature.wsp solution file, deploys the solution throughout all web front ends, and activates the CardioLog Analytics feature. If this step fails, please see "CardioLog Analytics" SharePoint Feature Manual Installation Procedure.
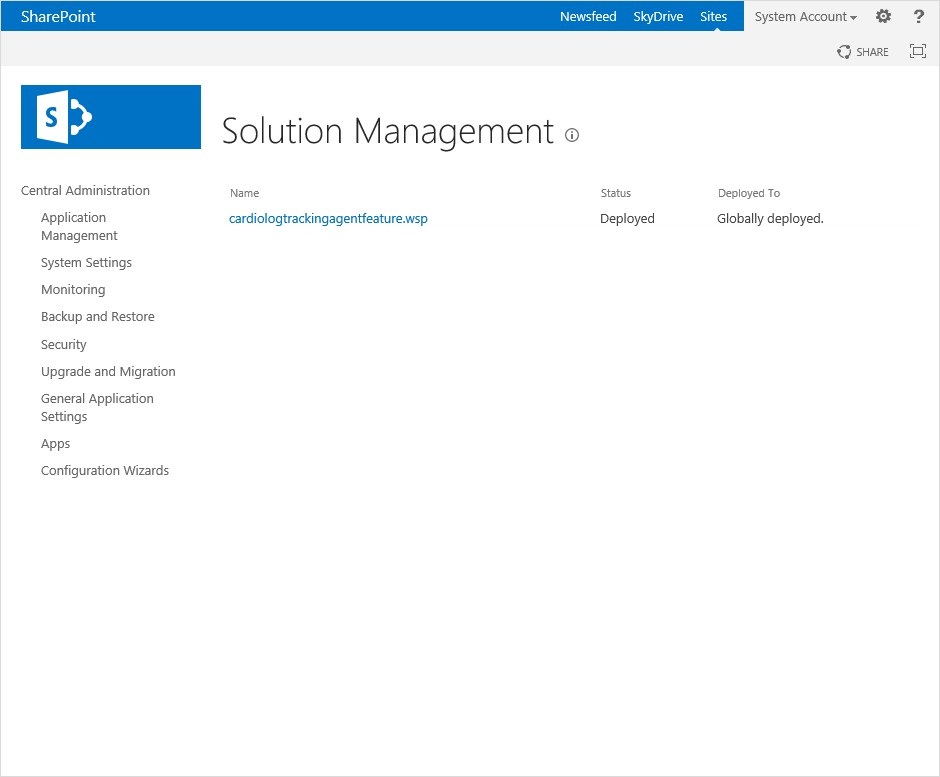
To confirm the solution has deployed properly, go to SharePoint 2013, and navigate to Central Administration > System Settings > Manage farm solutions
SharePoint 2013 - Solution Management
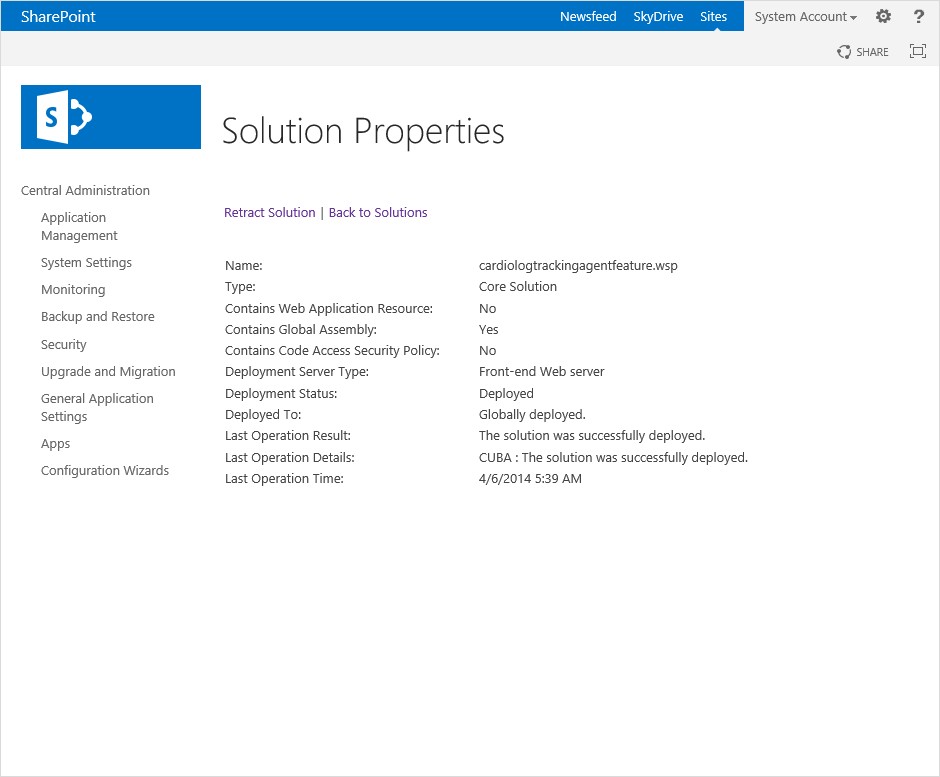
In the Solution Properties window, click cardiologtrackingagentfeature.wsp and verify that the solution was successfully deployed to all web front ends.SharePoint 2013 - Solution Properties
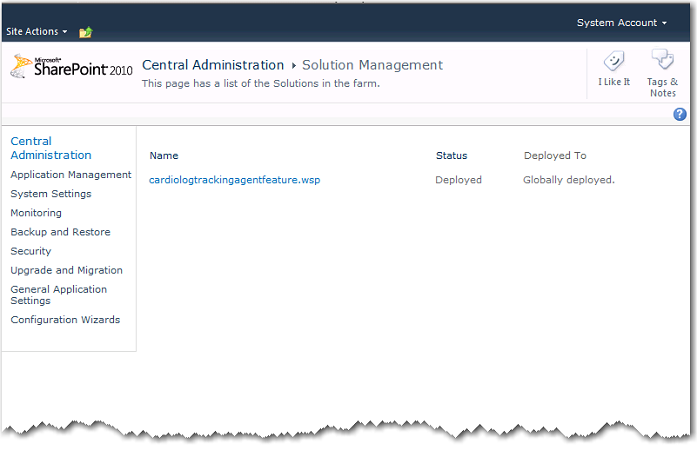
To view the deployed solution in SharePoint 2010, go to Central Administration > System Settings > Manage farm solutions
SharePoint 2010 - Solution Management
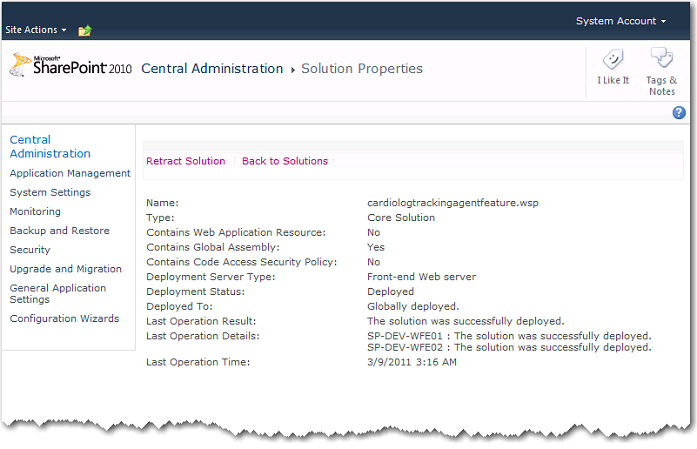
In the Solution Properties window, click cardiologtrackingagentfeature.wsp and verify that the solution was successfully deployed to all web front ends.
SharePoint 2010 - Solution Properties
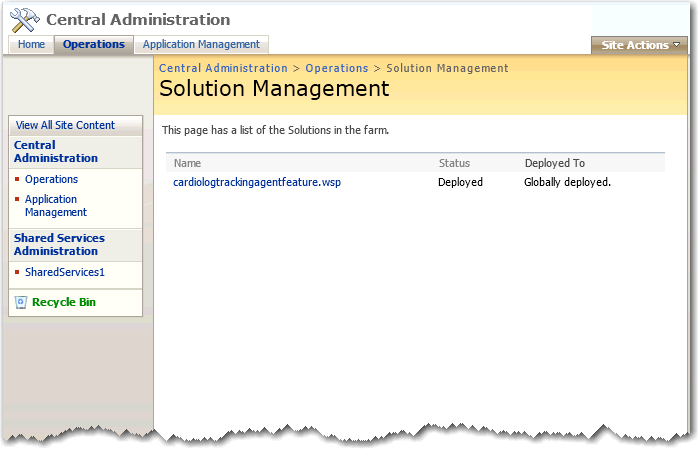
To view the deployed solution in MOSS 2007, go to Central Administration > Operations > Solution Management
MOSS 2007 - Solution Management
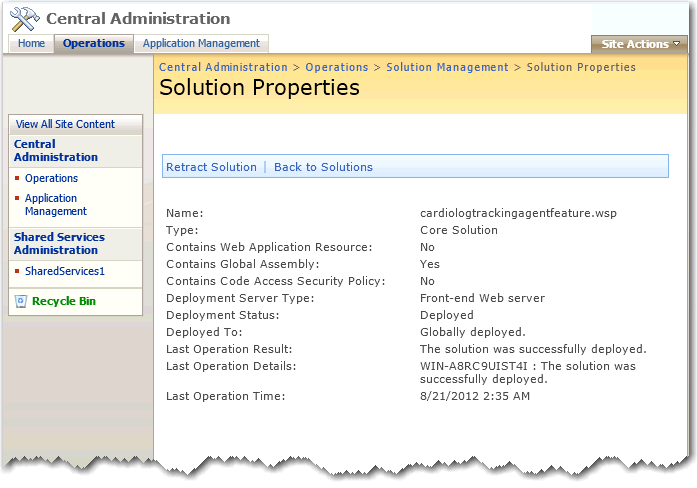
In the Solution Properties window, click cardiologtrackingagentfeature.wsp and verify that the solution was successfully deployed to all web front ends.
MOSS 2007 - Solution Properties
Activate/Deactivate Data CollectionThe CardioLog Analytics feature is automatically activated and starts data collection immediately upon installation. The CardioLog Analytics solution may also be manually deactivated and reactivated.
Warning: Deactivating the solution will stop all data collection until reactivated.
To deactivate the CardioLog Analytics feature in SharePoint 2013, go to Central Administration > System Settings > Manage farm features
SharePoint 2013 - Manage farm featuresTo deactivate the CardioLog Analytics feature in SharePoint 2010, go to Central Administration > System Settings > Manage farm features
SharePoint 2010 - Manage farm features
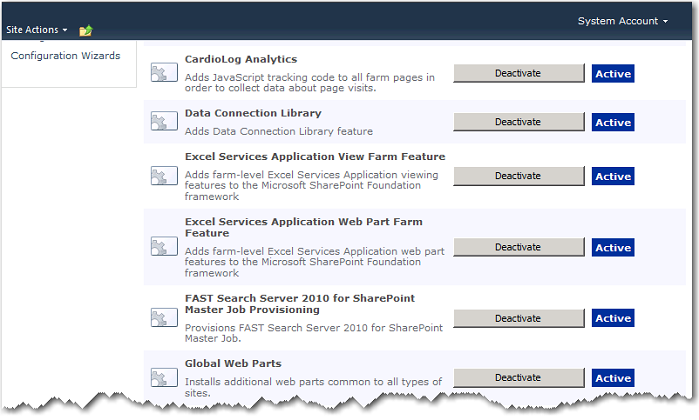
To deactivate the CardioLog Analytics feature in MOSS 2007, go to Central Administration > Operations > Manage farm features
MOSS 2007 - Manage farm features
Note: The CardioLog Analytics SharePoint Feature will work only for master pages which contain the following control in the head section:<SharePoint:DelegateControl runat="server" ControlId="AdditionalPageHead" AllowMultipleControls="true"/>
This control is included in the master pages for all SharePoint templates, except the MOSS 2007 Publishing Site master page. Add this control to all MOSS 2007 Publishing Site master pages, right before the closing </HEAD> tag. Alternatively, you can also use a top master file, which is included in all of the Publishing Sites master pages, in order to perform a single update.
Automatically add the JavaScript tracking code
Notes: This step should be done for each WFE. The CardioLog service account must have write permissions to the SharePoint template directory:
[SharePoint 2013 Server]\%PROGRAMFILES%\Common Files\Microsoft Shared\web server extensions\15\TEMPLATE
[SharePoint 2010 Server]\%PROGRAMFILES%\Common Files\Microsoft Shared\web server extensions\14\TEMPLATE
[SharePoint 2007 Server]\%PROGRAMFILES%\Common Files\Microsoft Shared\web server extensions\12\TEMPLATE
Configuring Multiple Web Applications
In order to monitor an additional web application in your existing farm, please do the following:
- Add the required SQL permissions to the CardioLog service account - db_datareader for the SharePoint portal content database.
- In the Administration pane, click System Configuration, and then select SharePoint Tree Adaptor.
- Click on your SharePoint farm and select the web application/s you want to monitor.
- Click Save.
- In versions lower than 2.0.8.0, add the portal root URL to the "includedWebApps" key in the <CardioLog Installation Folder>\SP20XXTree\web.config file (XX - 07 for MOSS 2007, 10 for SharePoint 2010, 13 for SharePoint 2013).
- Restart the CardioLog Scheduling Service. The tree structure will be refreshed the next day.
- If you are using the CardioLog Analytics tracking feature or if you have configured the CardioLogAgent web application on the SharePoint WFEs, open the new web application in IIS Manager and verify that the CardioLogAgent folder under the "_layouts" directory is configured as a web application (if not, right click on it and select "Convert to Application").
- Verify data collection from the new web application.


