CardioLog Analytics provides the ability to segment authenticated visitors by their user names, and the groups they belong to. The organizational hierarchy of users and groups is monitored by the Active Directory Updates service. Data is retrieved directly from Active Directory or SharePoint by default. The Active Directory Updates service can also retrieve the data from a custom source, using a designated web service that supplies the user and group organizational structure. To include any profile details with your user data, see User Category Management.
Contents
Users and Group Management
Add a New User and Group Source
CardioLog includes a simple tool for integrating user and group sources.
- From the navigation pane in CardioLog go to Administration > CardioLog Scheduling Service > Active Directory Updates.
- Set the service Scheduling Type to Daily at 00:00.
- Click OK.
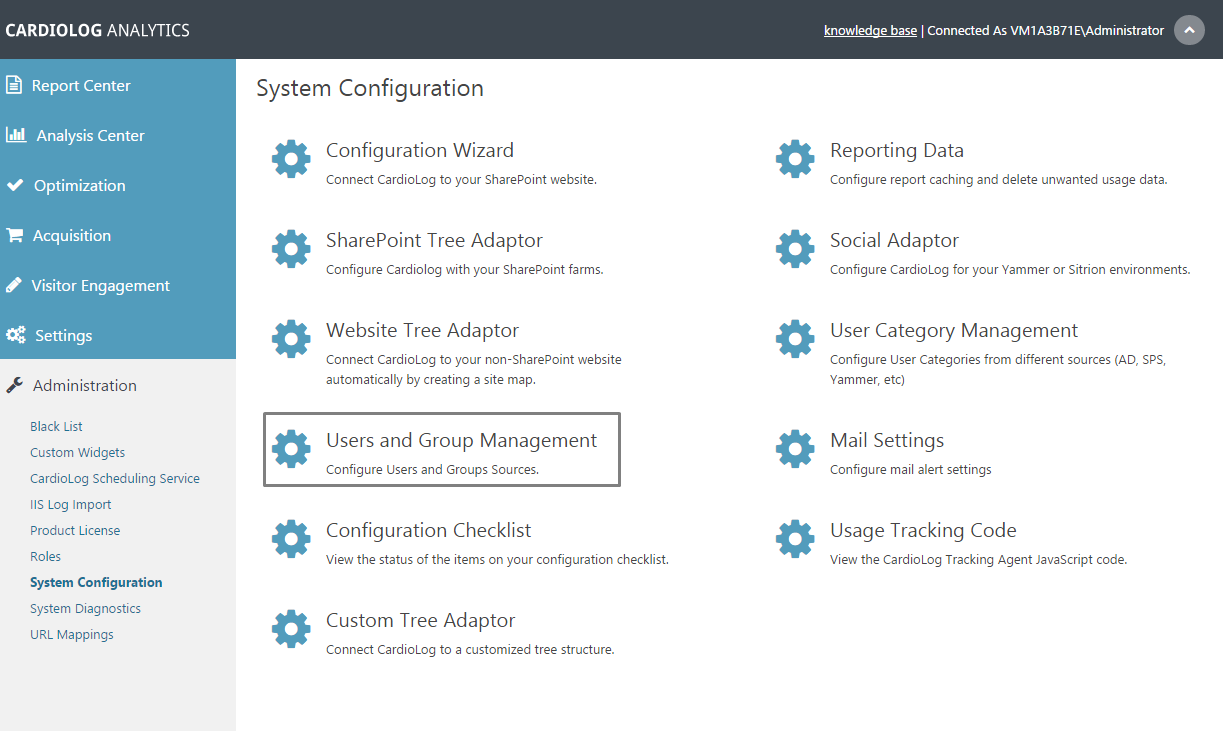
- From the Administration navigation pane, select System Configuration, and then select User and Group Management from the main window.
System Configuration Main Window - In the upper right hand corner, select Add Source and choose the relevant category.
User and Group Management: Add Source - You will now be presented with the relevant form. Continue on to Active Directory, SharePoint or Custom Source below.
Configuring Active Directory User and Group Service
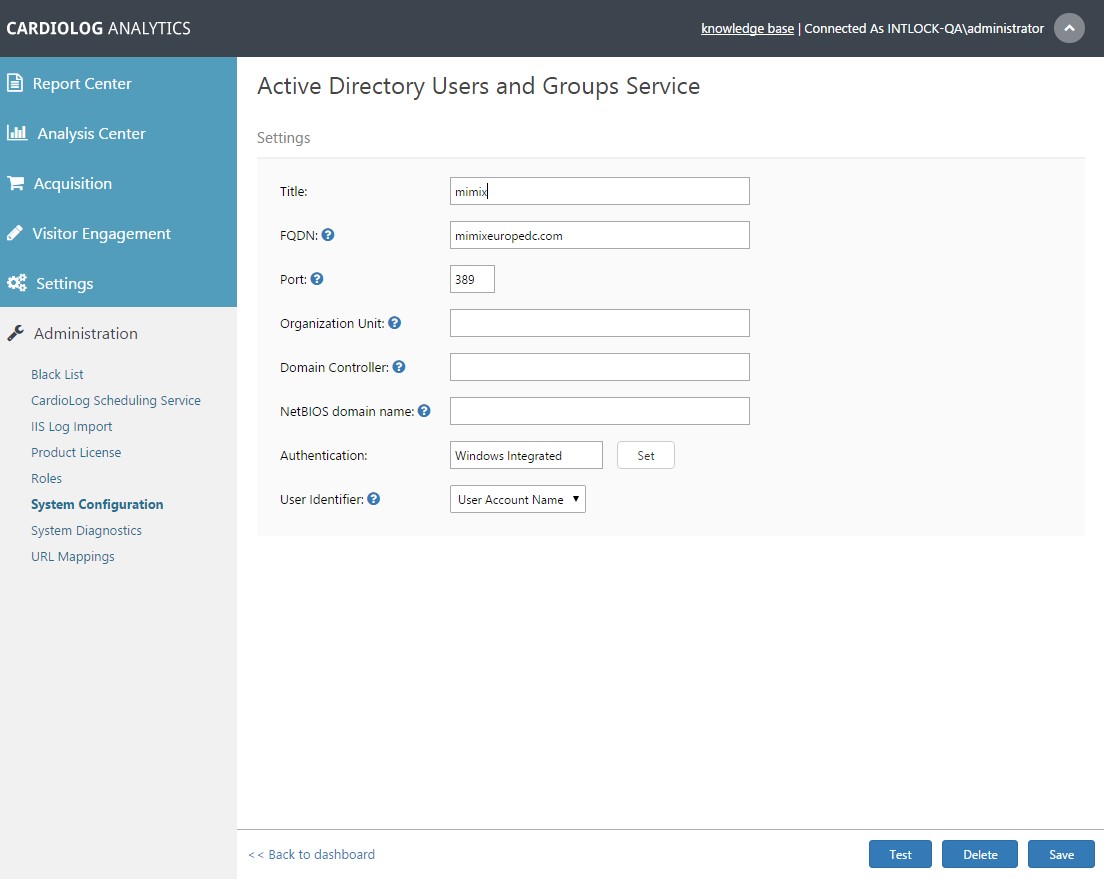
- Enter the name of your Active Directory source.
- Enter the Fully Qualified Domain Name (FQDN) in the text box (eg., mycompany.com)
- Enter the LDAP port.
- List the Organization Units you would like to import users from, separated by a comma between each phrase. Leave blank to import users from the entire directory (optional).
- Enter the DNS name of the domain controller (optional).
- Enter the NetBios domain name, which is the user domain name.
- Click Set next to the Authentication method to confirm login details. You may be prompted with a dialogue to enter any missing information.
- Select the User identifier that will be associated with any Active Directory accounts, select either User Account Name or Email.
User Account Name is typically used when tracking SharePoint on-premise.
Email is typically used when tracking SharePoint Online or when using Azure Active Directory. - Click Test to test the connection to your Active Directory domain.
- Click Save to return to the User And Group Management dashboard.
User and Group Management: Active Directory Source
Configuring SharePoint Users Service
CardioLog allows you to integrate user information from multiple SharePoint farms. Follow these instructions for each SharePoint farm you would like to integrate into CardioLog reports.
- Enter the title of your SharePoint network.
- Select the version of SharePoint that you currently use to manage your website.
- Click Save to return to the User And Group Management dashboard.
System Configuration - Users and Group Management - SharePoint Source
- In the Administration section of the navigation pane, click System Configuration, and then select SharePoint Tree Adaptor.
- Select your SharePoint farm.
- In the SharePoint Tree Adaptor dialog, fill out the following fields:
- SharePoint Profile Database Name - Add the db_datareader SQL permissions to the CardioLog service account for the SharePoint profile database.
Configuring a Custom User Service
In addition to entering the relevant information as described below, see Custom User and Group Adaptor for more information about correct formatting for accurate integration.
- Enter a title name to describe the new source.
- For the Web Service URL, enter the link to the formatted XML schema with either an XML, ASPX or ASMX file extension.
- Choose Yes next to Is Web Service in most cases.
- You may optionally edit the Web Method Name if you'd like.
- Click Set next to the Authentication method to confirm login details. You may be prompted with a dialogue to enter any missing information.
- Click Save to return to the User And Group Management dashboard.
User and Group Management: Custom Users Service


